Analytic accounting is useful in so many ways, it helps companies analyze all their transactions more precisely. Whether it is expenses or earnings, Odoo's analytic accounting features help in keeping track of all the transactions. Moreover, it allows you to analyze the project, services, departments, and product’s performance.
Simply put, this feature allows you to keep a tab on all the transactions per department, project, etc. Also, you do not have to create the journals for all the transactions, you can simply create analytic accounts for them. In other words, you can create analytic accounts and tags without having you create a bunch of accounts in a chart of accounts.
This Odoo accounting feature generates reports that give insight into all the expenses and earnings linked to a particular project or department.
In this blog, we will see how to activate & use analytic accounting features and how it helps businesses track the expenses or earnings associated with projects or departments.
The very step for activating the Analytic Accounting feature is to go to the Accounting Module.
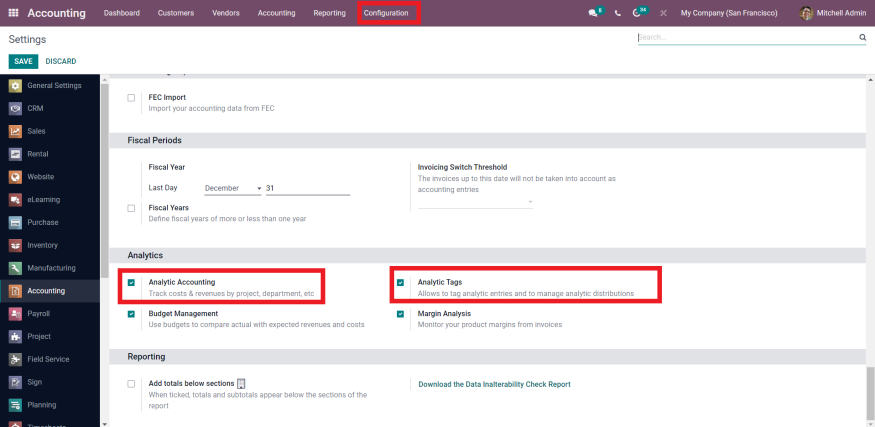
Go to Accounting modules >> Configuration >> Settings >> Analytics
Once you go to the configuration settings screen, you will see the section for Analytics. Here, you need to mark the check on the Analytic Accounting box. And also, you can activate the analytic tags feature by marking the check on the box.
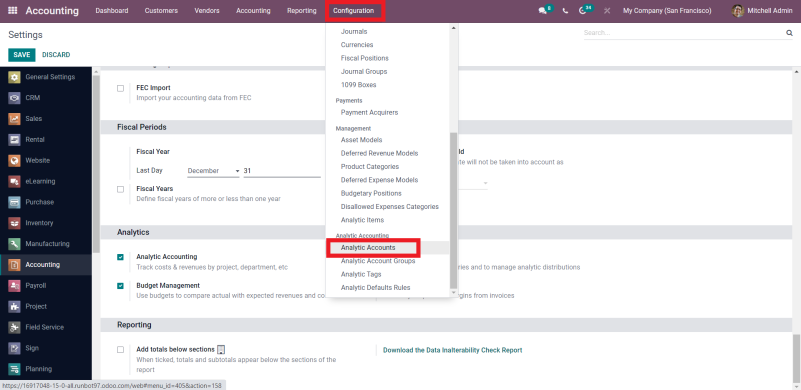
Once you enable the analytic accounting feature, you will get the option for Analytic Accounts under the Configuration menu.
Go to Configuration >> Analytic Accounting >> Analytic Accounts.
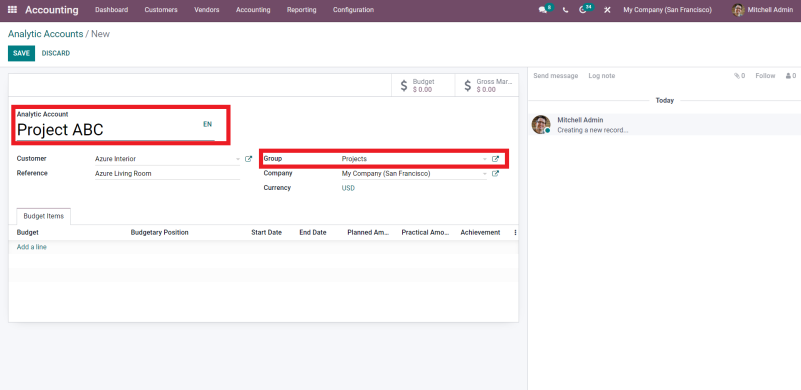
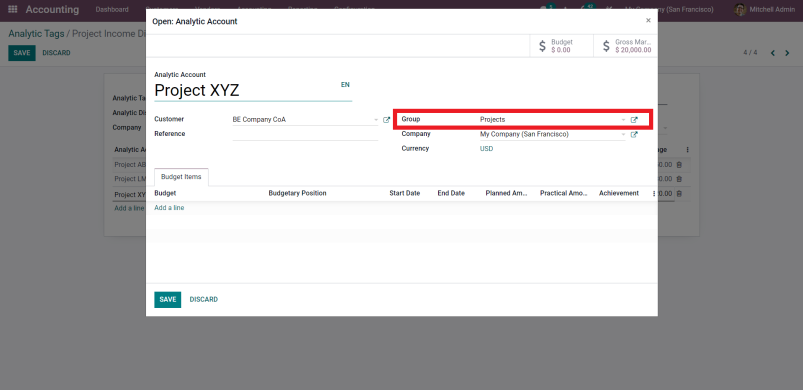
Now, click on the analytic accounts and you can view and create analytic accounts.
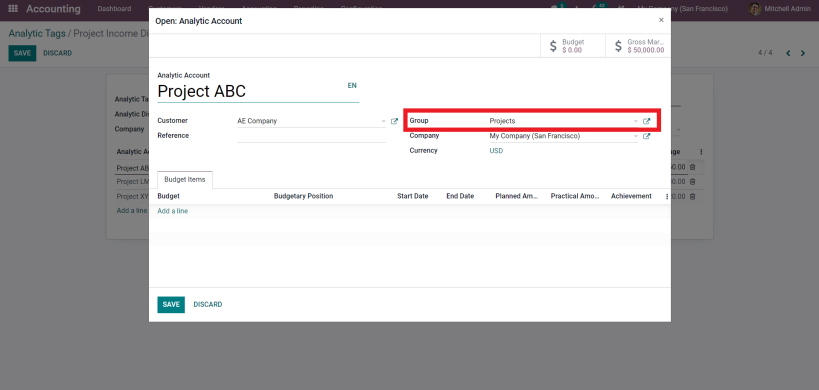
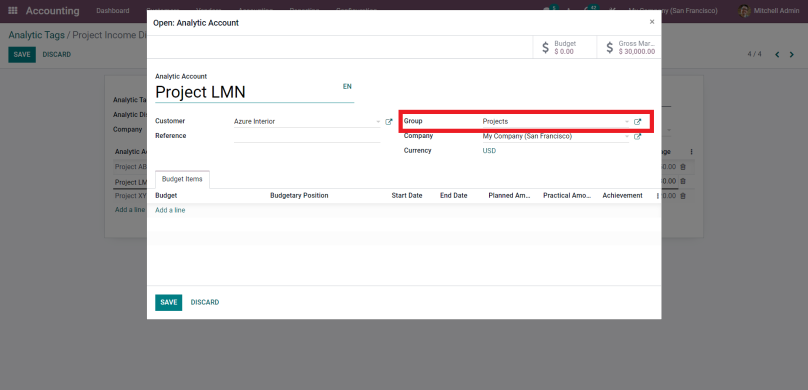
Click on the create button and then add name, select customer, company (if you are using multi-company), and fill in other details. Also, you can select and specify the group. This helps in keeping similar types of analytic accounts in a group. Further, it will help you view the accounts as per the groups.

To check the expense associated with an analytic account, you need to create bills first.
Now, go to the Vendors menu, click on Bills, and click on create.
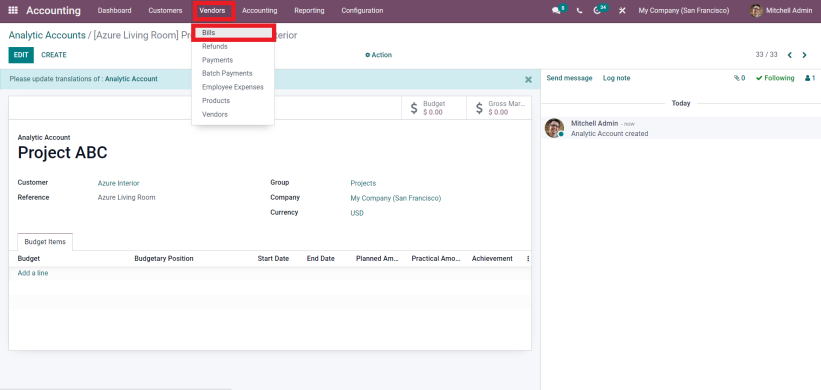
Add the Vendor name, Bill date, Due Date, etc. to the billing record.
Further, in the invoice lines add product, Analytic Account, Quantity, Price, Tax, etc.
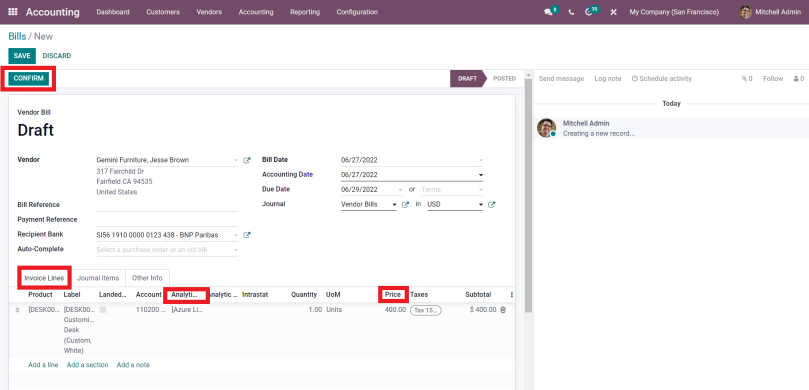
Now, save and confirm the Vendor Bill, it will post the vendor bill entry.
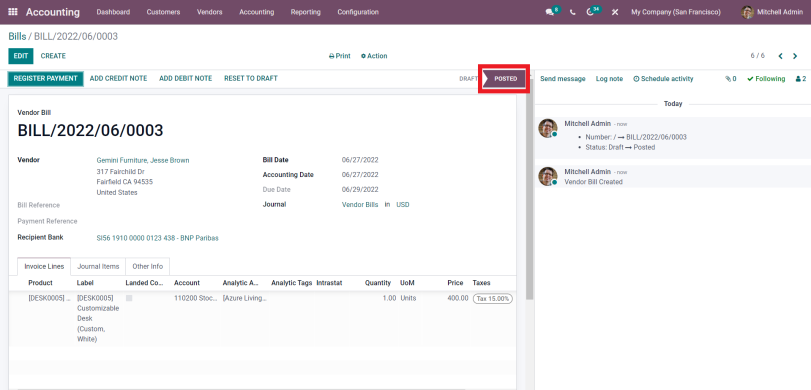
To see if the expense is recorded as an analytic item, go to the Configuration then select Analytic Items under the Management menu.
Go to the Configuration >> Management >> Analytic Items
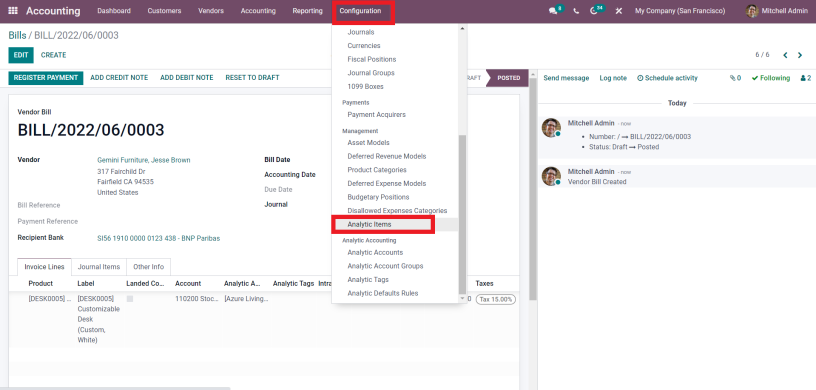
Click on analytic items, here you can view all the analytic Items
And, to see a particular item, click on Group By and select Analytic Account
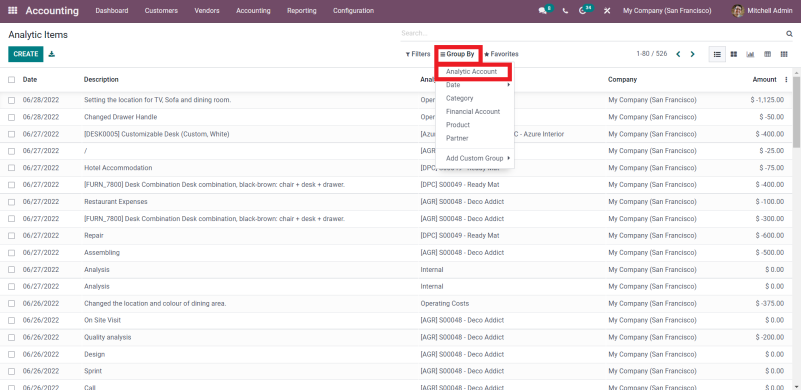
Now, you will be able to see the multiple Analytic Account separately
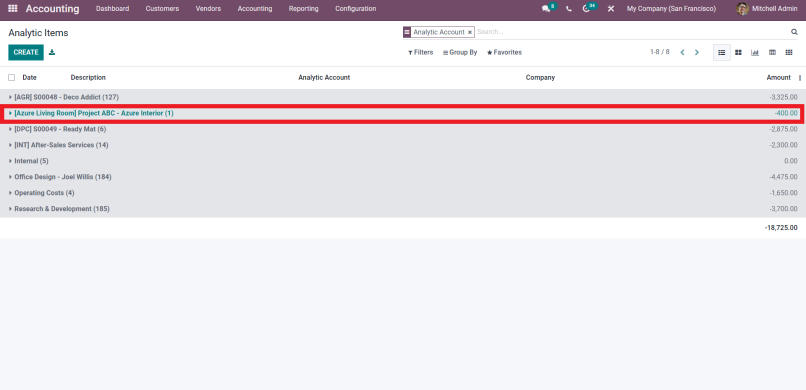
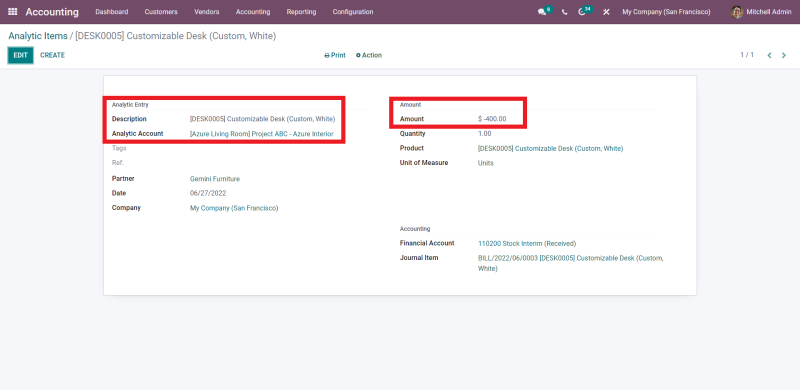
Further, select the analytic item,(it can be a vendor bill, invoice, or timesheet) to get a complete overview of the record.
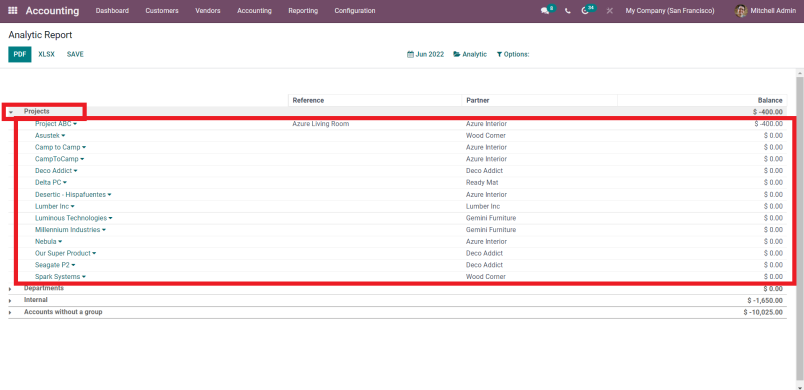
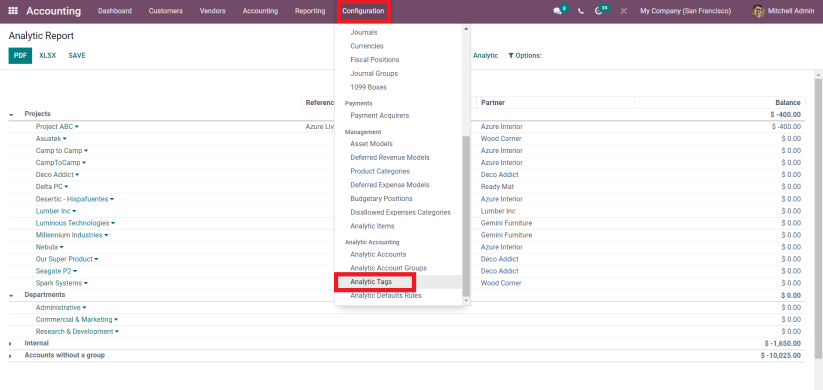
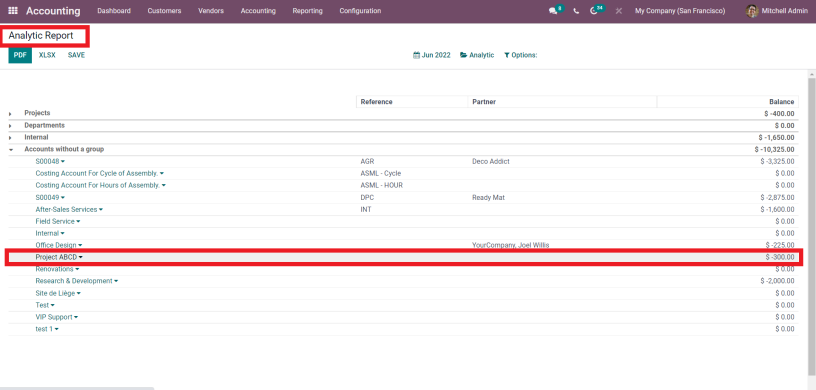
For getting the analytic reports, go to Reporting Menu >> Management >> Analytic Report.
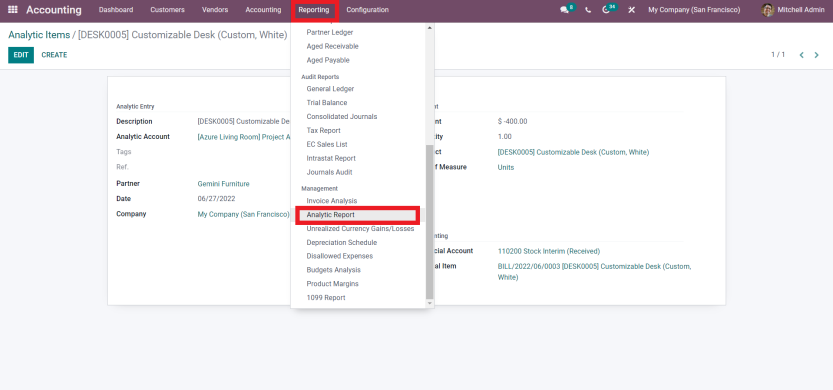
Here, you will be able to view all Analytic Reports at once.
Also, you can filter reports on a monthly, quarterly, and yearly basis.
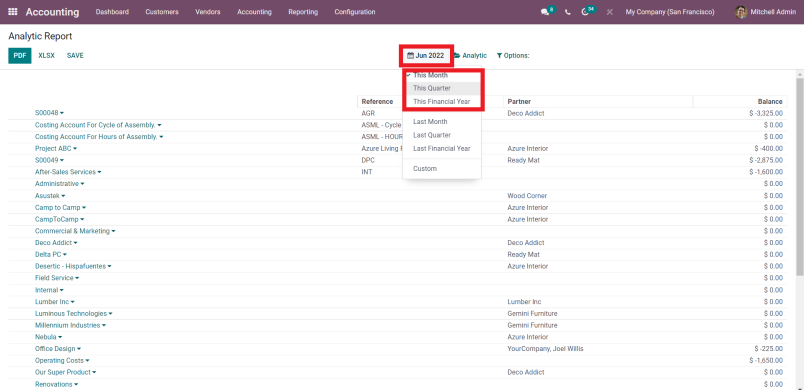
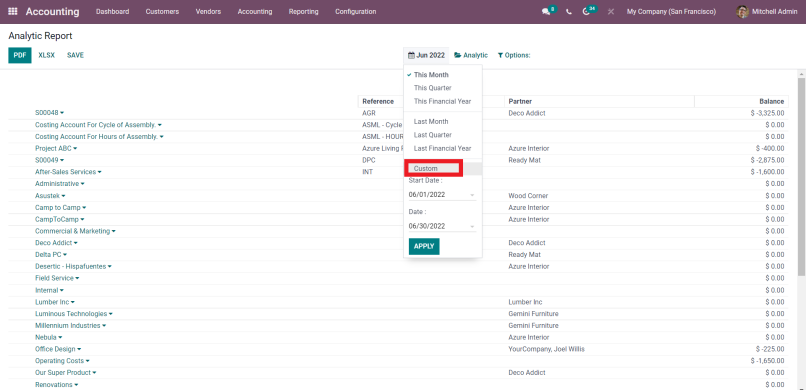
There is an option for a Custom filter, in which you can select a particular date range.
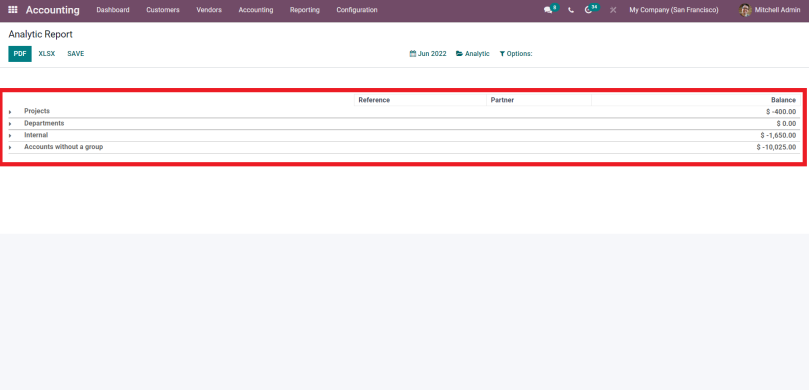
Moving further, there is an Options button from where you can filter the Analytic Report on the Hierarchy and Subtotal basis. It really makes the analytic reporting analysis simpler.
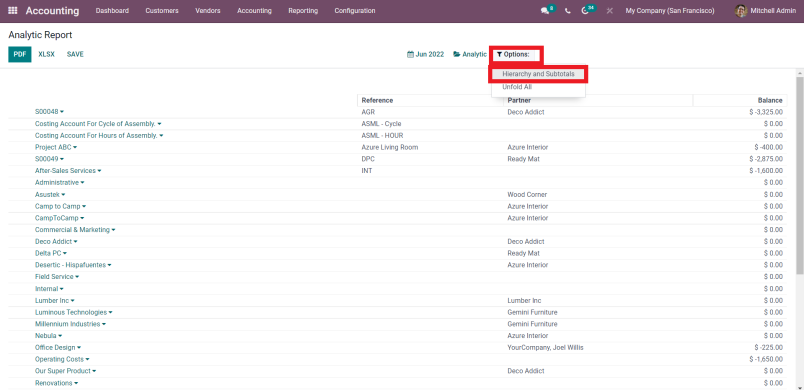
See groups and the analysis accounts associated with them.
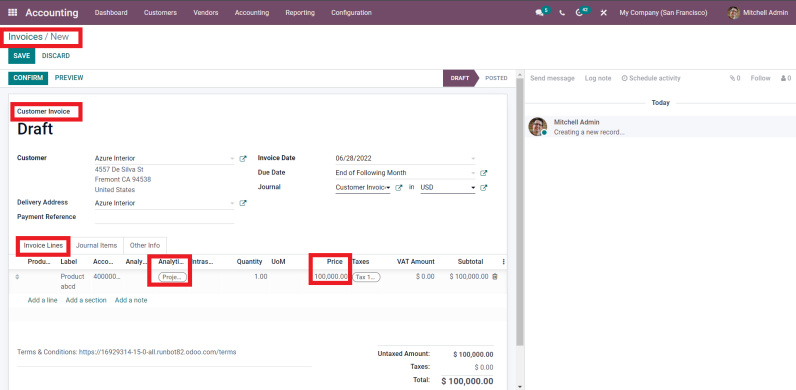
For analyzing the gross margin, which is the difference between the income and cost, create an invoice for the same analytic account.
Go to Customers Invoice and Create an Invoice. Simply, add Customer Name, Invoice Date, Due Date, and fill in other details.
Moreover, add the product, analytic account, price, etc. in invoice lines. Choose the same analytic account as the bill.
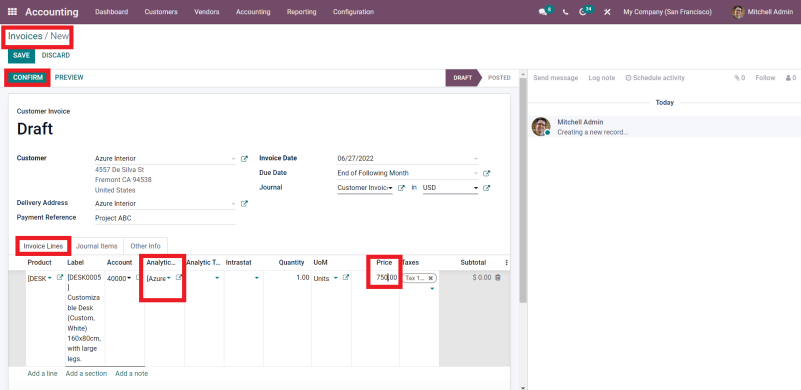
Save and confirm the invoice to post the entry.
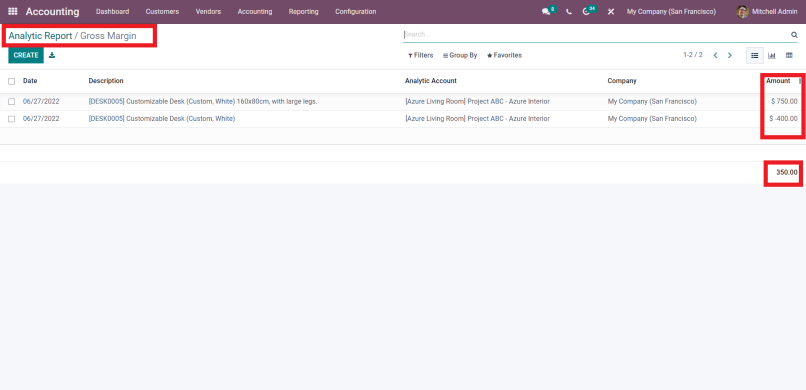
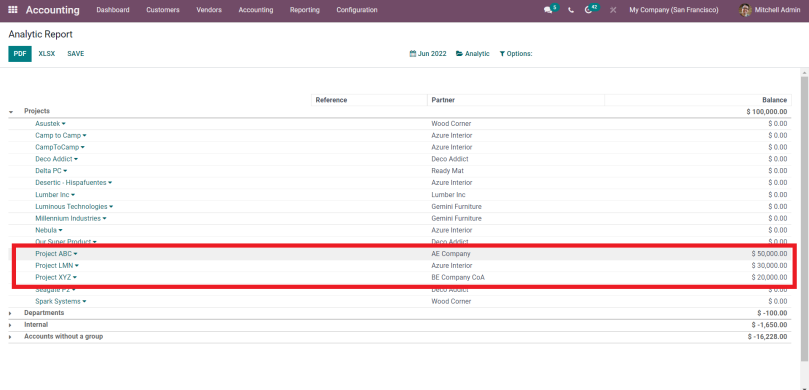
Once you create and post an invoice, you are ready to view the analytic report and analyze the gross margin for the account.
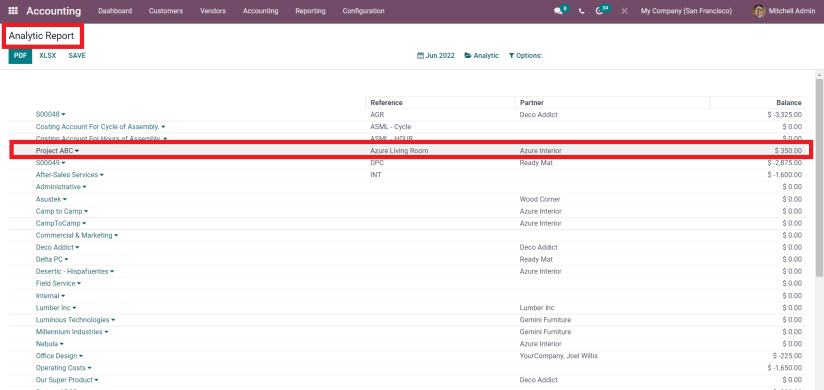
Here, you can view and analyze the Gross Margin for an analytic account.
In this way, you can easily track and review all the costs and revenue associated with an analytic account.
The most fascinating feature of Odoo analytic accounting is analytic tags. You might be thinking about how important a tag could be. Here is the answer, creating Analytic Tags helps in analytic distribution by dividing expenses or earnings among various Odoo analytic accounts.
To explain it further, let’s see how an analytic tag can do so much more than just being a tag in a record.
For creating analytic tags, go to Configuration >> Analytic Accounting >> Analytic Tags.
Simply, create an Analytic Tag and mark the check on the Analytic Distribution box. It is important if you want the same tag for multiple analytic accounts. Also, it helps in distributing the revenue and cost.
When you check the Analytic Distribution box, you will get the option to add analytic accounts. You can add one or multiple Analytic Accounts.
Moreover, you can distribute the percentage against the analytic account. It surely helps in distributing the cost and income into various departments and projects.
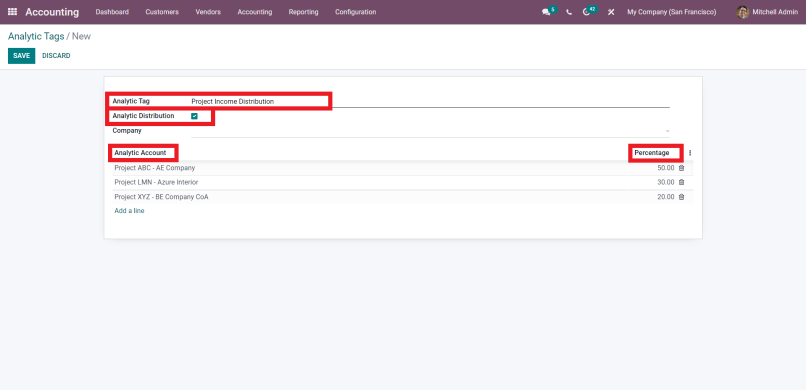
But, you need to make sure that all the accounts have the same group.
To check if the percentage distributed is working correctly, create the invoice and select the tag.
Now, you can see the total amount of the invoice will be allocated among the analytic accounts as per the percentage defined.
Furthermore, another function of analytic accounting is that it integrates with the Odoo project module. Let’s understand how it works.
As I have mentioned in the beginning, analytic accounting is integrated with the projects and the time consumption in the project task will be calculated in terms of cost.
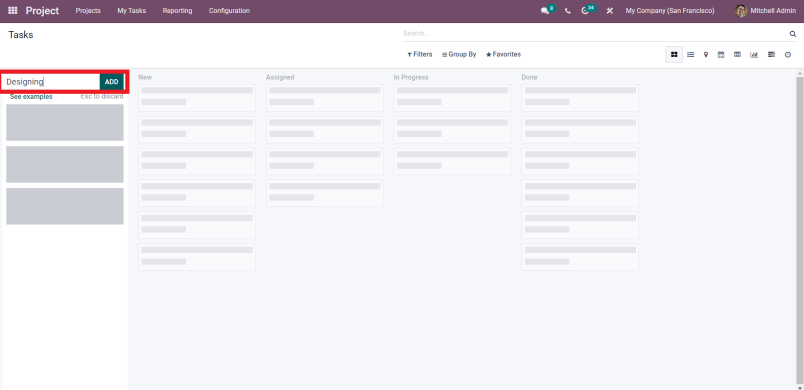
Go to Project Module >> Create Project >> add Project Name.
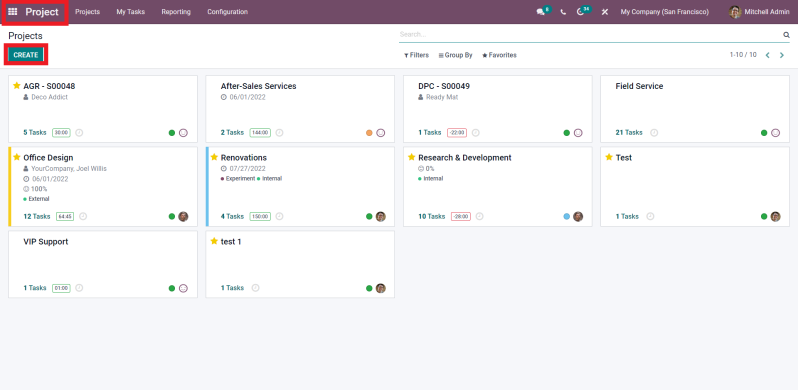

Further, create stages and add tasks to the project.
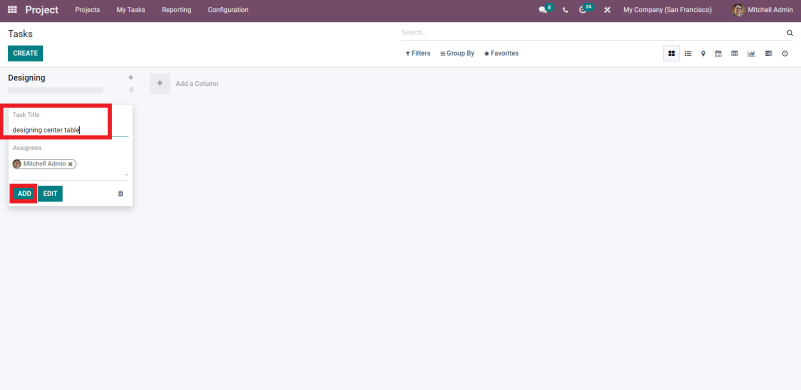
After creating the task, fill out the timesheet, and add the date, employee, project description, and hours spent on the task.
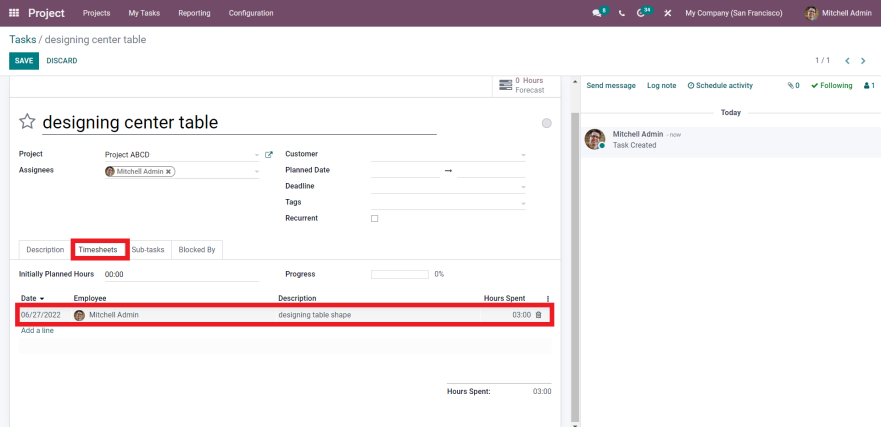
Now, go to the accounting module and then go to the analytic report, here you will see the project as an analytic account. Odoo automatically creates projects as analytic accounts and considers timesheet hours as a cost or expense that you have set on the employee record. It means, you will see the time spent as a cost in the analytic account, for example, if you have set employees one hour as a hundred dollars, it will make the 3 hours spent on a task a three hundred dollars expense.
In this way, you can manage all your transactions in the analytic accounts and keep a tab on all the expenditures and earnings. This will never let a business miss a single transaction. Also, you can see how profitable a department, project, product, or service is. This advanced feature makes accounting more efficient and simpler for businesses. Also, if you want to customize the Odoo, the certified Odoo partners can help you with this. OdooExpress has a team of certified developers and consultants, they can customize the system as per your request.
Odoo accounting consists of so many advanced features, to know more about Odoo, connect with the Odoo experts.